This has been a long overdue post on how useful having access to a 3D printer can be. I have one for the past few months and I am still learning new functions in the program slicer and I am very rusty in terms of CAD design software. Throughout my career, I learned a little bit of AutoCAD but I never really used, so most of it I had forgotten. Thus, having a 3D printer gave me an opportunity to re-learn CAD and of course, learn about the intricacies of preparing a 3D model to be put into our physical world.I am not going to go much in depth as this post is not a tutorial on how to design and 3D print parts. There is simply too much to cover and much better resources out there. To illustrate the "wonders of 3D printing", I will focus on a simple, yet useful feature of 3D printing: DIY repairs.
My printer is the Creality Ender 3 v2, that despite being a budget, is a very competent printer, especially for beginners.
 |
| My 3D printer setup with some customized (printed) mods |
And to better exemplify this great functionality of the printer, I am gonna use this real example: replacing a broken handle from my shed. The shed in question is a Rubbermaid Jumbo Storage Shed (52 x 30 x 82" H-1229).
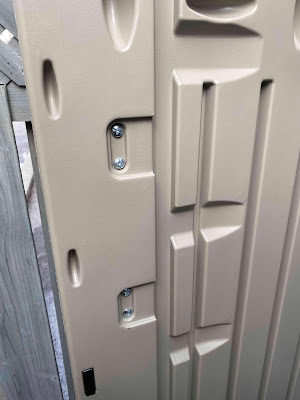
 |
| All 4 holding pins of the shed handle broke off |
The first step was to take detailed measurements of the existing handle with the help of a caliper.
Second step, transfer all the measurements into a CAD program. In this case, I used Rhino:
Third step, slice the 3D model in a slicer program to prepare for 3D printing. Due to the handle geometry, a lot of supports were needed in order to print it:
Note that I needed to shortened the non-structural edges to fit into my printer's bed.
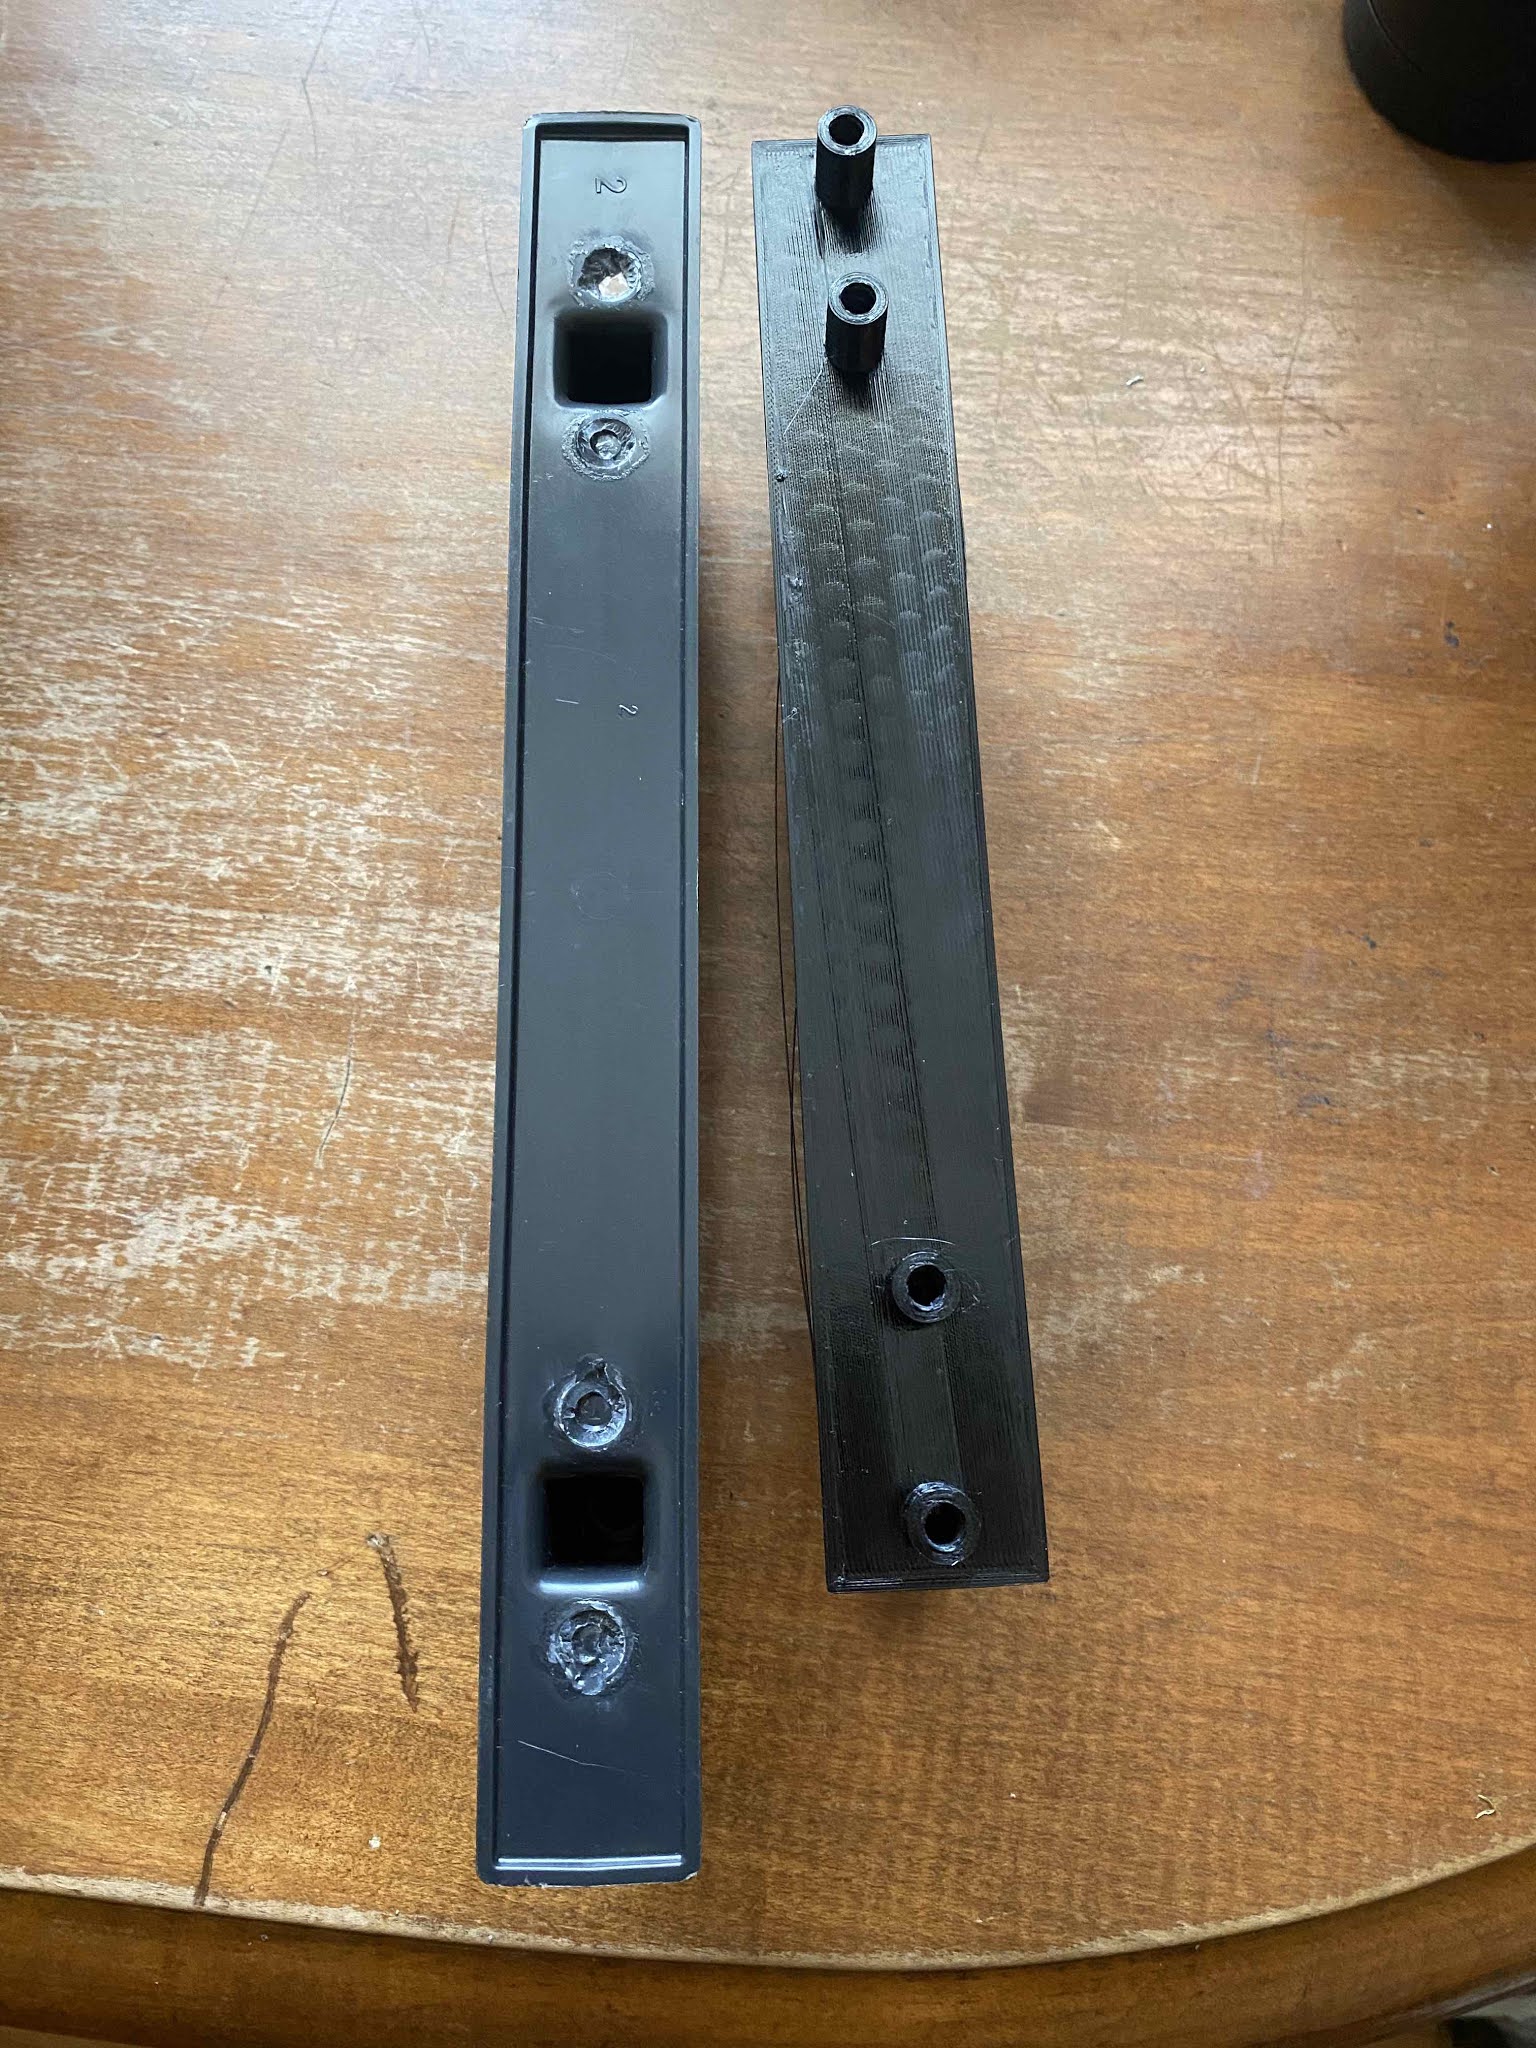
And after about 20 hours, here is the final product beside the original handle after the temporary supports were removed:
In order to make the supports easier to remove, I got more stringing on one of upside down surface. I then used a small torch to fix the stringing:
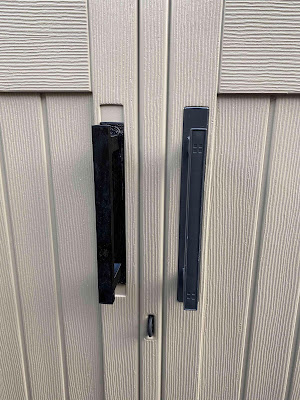
And now, to the final trial: installing the new handle in the shed door.
All I needed to do was to slowly force the screws into the new printed handle to carve the treads into the new handle holder. It fits nicely and is functional! :)
Click here to download my 3D model of the shed door handle.


I love printing for DIY repairs and parts. Sure pretty things are cool and all but there's nothing like repairing something without having to spend $$ on a vendor part :)
ReplyDeleteI am grateful to this blog site providing special as well as useful understanding concerning this subject.
ReplyDeleteapple repair edmonton
Thank you for your comment and support!
DeleteI need one of these made! Same exact shed, but the right handle. How much would you charge for one?
ReplyDeleteHello Dan, I'm glad you liked my design. I'm not sure where you are located, but I recommend you download my design (STL file linked in my article above) and then send it to a 3D printing service such as PCBWay (www.pcbway.com). Their turnaround seems quite fast. Good luck fixing your shed handle!
DeleteGreat job for publishing such a nice article. Your article isn’t only useful but it is additionally really informative. Thank you because you have been willing to share information with us. computer repair dubai
ReplyDeleteGreat post! I really enjoyed the insights shared here. It’s always refreshing to read content that’s not only informative but also thought-provoking. Looking forward to reading more from you! Keep up the great work!
ReplyDeleteIf anyone here is looking for awesome K-pop gear, check out Kpop Merch Store – we offer a wide range of exclusive K-pop items, from apparel to posters and accessories. Perfect for any K-pop lover!