Once again, let's talk about a very important mod/upgrade you can do to your classic Mac Pro (cMP): the Pixlas mod. The Pixlas mod will allow you to install a more power GPU into the Mac Pro that it was designed for, by drawing more current directly from the power supply of the cMP as opposed to using power connectors available on the motherboard.
If you try to install a powerful GPU
Before proceeding, some key links you should read before jumping in:
- The House of Moth - Pixlas Mod tutorial (excellent and detailed instructions provided by Jay)
- MacProUpgrade facebook community

Things you will need for this mod:
This post is by no means a tutorial, I'm just sharing my own experience doing this mod. Please follow the detailed tutorial (link above) and you should not have any issues.
Firstly, I carefully removed the power supply from my Mac Pro, remove the black tape holding the power supply output wiring together. I gave it a good clean with isopropyl alcohol on the cable to remove the tape residue.
Before installing the wire taps (yellow), I used an office knife to carefully cut around the thick wire insulation to expose the copper and make it easier to install the wire taps. This will also ensure that there is an electrical connection between the metal inside the wire tape and the desired wire.
I then installed the wire taps following the very important hint on the tutorial: know where to install the taps before doing so to ensure there is enough distance/clearance between the wires to avoid a bulky area when mounting the power supply back in the cMP. The power supply cable should be able to sit flat as per original design.
 |
| Work on the power supply completed |
After installing the wire taps, I used a multimeter to test if the metal exit from the taps made connection to the wire by checking continuity to the main plug pins to each of the metal tap exit.
Then, using an insulating kapton tape (red), I guided the "Open-end power cable" through the opening near the front and end of the cMP case. Then the taps were installed to allow the connection to the wire taps on the power supply.
 |
| Power supply re-installed and open-end power cable ready for the taps installation. |
After removing the tape used to guide the power cable, the matching taps (blue) were installed using the crimper on the power cable.
With the taps (blue) crimped into the new power cable, they were connected to the power supply wire taps (yellow) installed previously on the power supply cable.
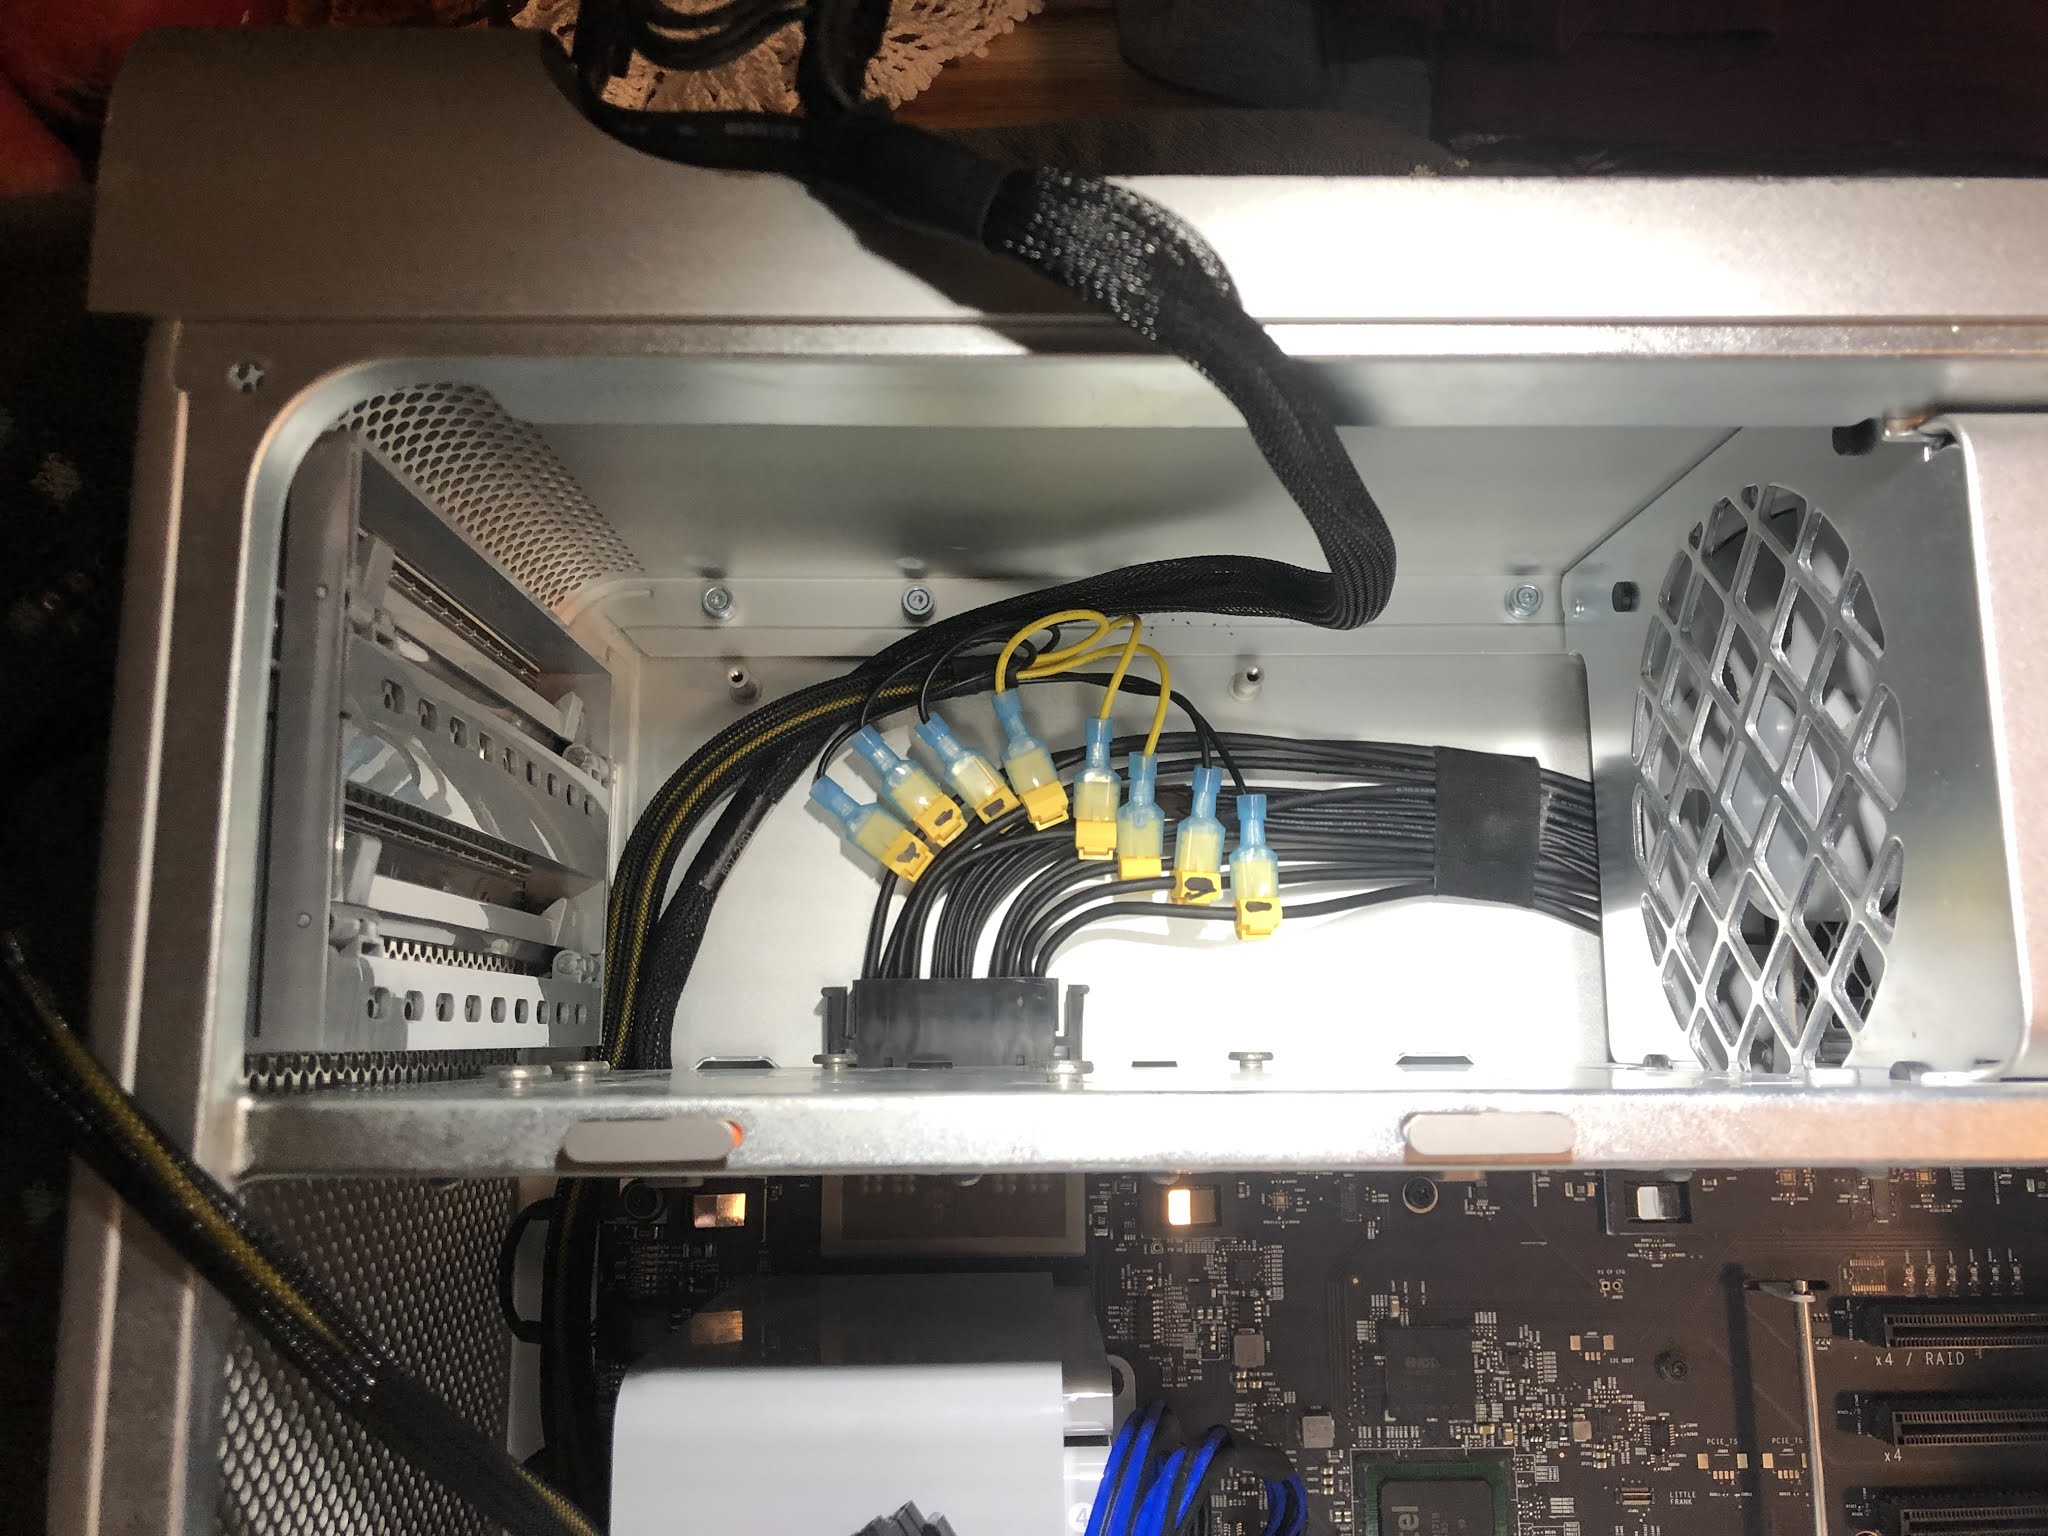 |
| Pixlas mod: all connections made |
 |
| Pixlas mod completed! |
 |
| Detail of the Pixlas mod, safely powering my Vega 64 GPU |
No comments:
Post a Comment