First of all, Happy 2022 everyone!
It has been a long time since my last post, to compensate this will be a long and detailed post about the 3D printer upgrades I installed in the last 18 months.
Before acquiring my 3D printer back in mid-2020, I researched through several articles and reviews for a while. I was looking for a competent, relatively reliable entry-level FDM/FFM printer with future upgrade potential that would not break the bank (after all, my printer would not be used often, just as a hobby really).
Although there are options of 3D printers the come completely assembled, I was not afraid to opt for a DIY model, where some initial assembly is needed. I ended up narrowing my search down to the Chinese brand Creality and ultimately to their Ender 3 v2 model.
 |
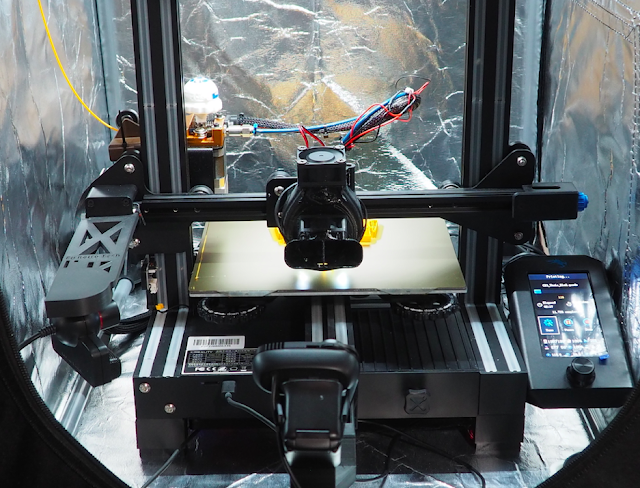
| My heavily modded Ender 3v2 |
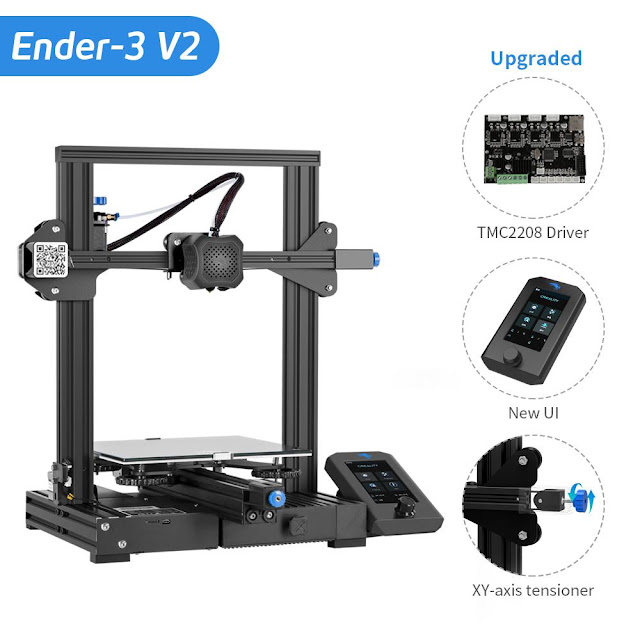 |
| The stock Ender 3 v2 as displayed on Creality's website |
The Ender 3 v2 is, as the name indicates, it is the 2nd and improved version of the VERY popular model Ender 3 that came out in early 2018. The Ender 3 gained significant popularity due to its reliability and good quality prints (for the money). The Ender 3 launched with a USD$ 150 MSRP. Due to the success of the Ender 3, Creality released in early 2020 their improved v2 version, that incorporated several improvements over their Ender 3 original model. These improvements were mostly created/added by the Ender 3 users over time, but if you didn't want to add them yourself, you could buy the v2 directly from Creality.
- Improved board with silent drivers
- Larger and Color LCD
- Belt tensioners
- Better print bed (tempered glass as opposed to Ender 3's aluminium bed).
With a MSRP of USD$ 250, the v2 quickly became popular as the included improvements were actually worth the extra cash asked. Creality kept (and still keeps) the Ender 3 on their portfolios of printers and their cheapest model - at the time of this writing the Ender 3 is being sold for USD$189 versus USD$262 for their Ender 3 v2.
With both printers (still) on the market, they share a large support community that has worked on the continuous improvement of their printers. The community has created/designed several add-ons and modifications (mods) to add features, increase reliability, printer quality, speed, reduce noise, etc on their printers. And the beauty of owning a 3D printer is that many of these mods you can print yourself!
These are most of the mods/upgrades I installed over time to further improve my Ender 3 v2 experience and functionality. By no means these are the "ultimate" or the "best" mods available for this printer, but I can recommend them (in no particular order) based on my own experience actually using them for a long time:
1) Spool Holder (RODAM - Fat Mod):
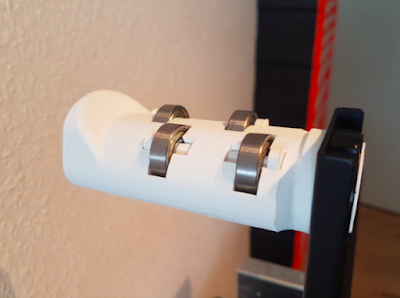 |
| This holder offers a significant improvement over the stock holder, reducing the friction between the filament spool and the holder |
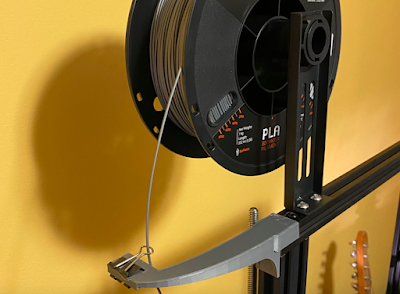 |
| This filament guide uses an office "bulldog clip" reduce the friction with the fliament and help guiding it throughout the extruder |
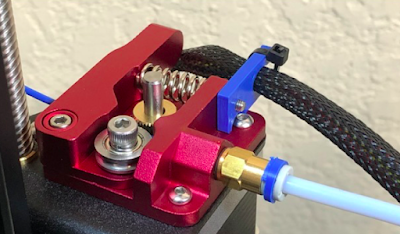
3) MacEwen 3D Upgraded Replacement Flexible Filament MK8 Extruder Aluminum Drive Feed for CR-10, Ender 3:
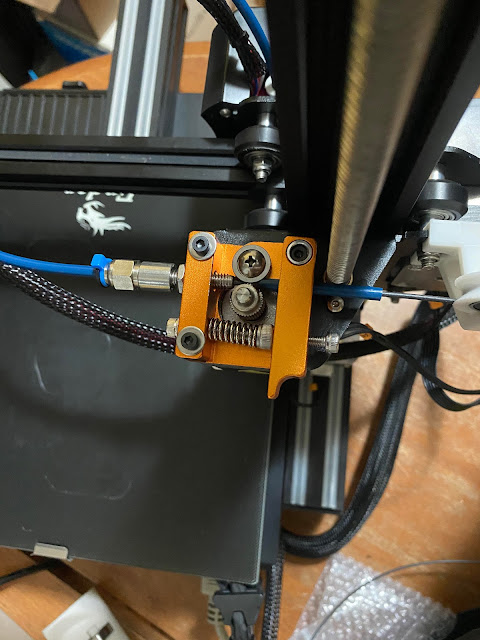 |
| This filament extruder guide is made out of aluminium (as opposed to OEM plastic) with a stainless steel drive gear (as opposed to the OEM brass). It has a Capricorn PTFE tube to guide the filament in making filament change a breeze compared to the original. |
As this aluminium extrude doesn't come with a cable holder, you should print this cable support to keep your printer organised:
BV3D Ender 3 Aluminum Extruder Cable Support:
 |
| Cable support |
4) Capricorn tubing:
 |
| This tubing is more precise/uniform than the OEM, reducing the friction between the filament and the tubing |
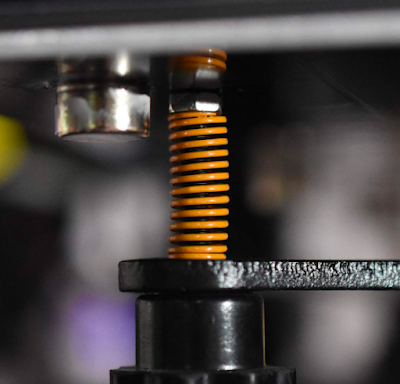 |
| These are probably the best upgrade for the money: these yellow springs are much stiffer than the OEM silver ones, saving you from re-levelling your bed often |
6) OctoPrint:

Using a RaspberryPi mini computer, you can add a whole lot of features your 3D printer. No more need to use your printer's SD card or have your printer near a computer to transfer files to it. With OctoPrint, you can send your files to the printer remotely and monitor your print also remotely.
I recommend watching this great videos on how to install OctoPrint:
- OctoPi 2021: OctoPrint + Raspberry Pi! Super Simple Setup (Mac & Win)
- How to setup Octoprint / Experimenting with Octolapse
And here is How I added 2 (two) cameras to OctoPrint, and these are my customised camera holder for the front camera (with FishEye lenses) and my extended camera holder for side PS3 camera (which moves with the Z-axis),
 |
| My 2 cameras with their custom holders in action |
7) Runout filament sensor:
By adding a simple switch, you can avoid loosing hours of printing time and material in case you run out of filament in the middle of a print. I used this design from Thingeverse that combines a filament guide (with a bearing) and a filament sensor all in one printable piece:
Ender 3 Filament Guide + Runout Sensor
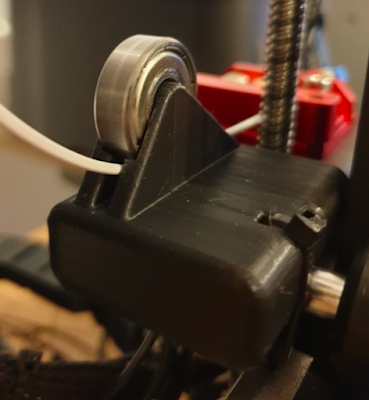 |
| All in one: Filament guide and runout sensor |
You will need to buy a KW12-3 PCB Microswitch, appropriate cable/wire with the JST connector that matches your Ender 3 v2 board sensor (if using the firmware to detect the filament out signal) or your Raspberry PI GPIO (if using OctoPrint).
Here is a cool and detailed video with a tutorial.
8) Silent Pack:
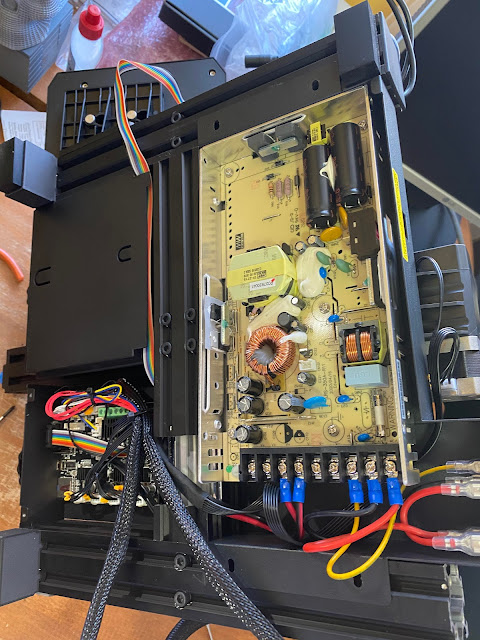
Even thought the Ender 3 v2 has silent drivers, the power supply (PSU) fan and motherboard fans are very loud. Thus, this is a very popular mod that not only quiet the printer significantly, but also improve the ventilation to both PSU and motherboard.
OBS: I highly recommend this mod to improve the ventilation of these components, especially if you use the printer inside an enclosure (like I do). There are premature failure of the PSU and layer shifting on prints that are related to the overheating of these components.
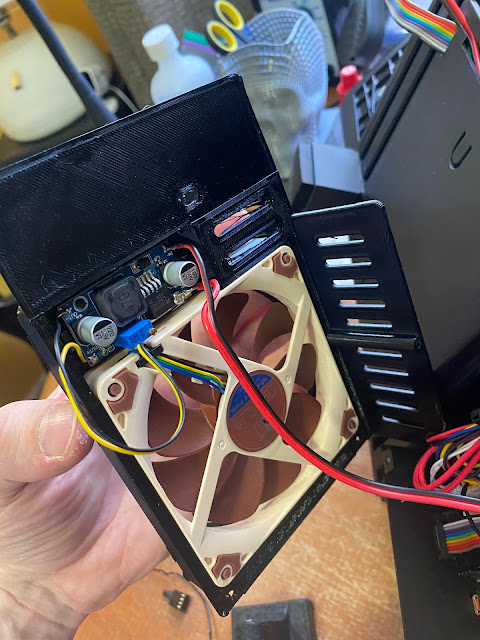
After you print both new PSU lid and Motherboard Lid (PETG is recommended) that will allow you to accommodate the larger (and quieter) fans and buck converters; and of course, acquired all the parts needed, follow the installation instructions carefully.
As you are going to be working on the bottom side of your printer, I recommend installing these feet risers (35mm) to increase the gap between your printer's fans and the surface to further improve the airflow. I choose these risers as they are easy to print, mount and they re-use the existing OEM rubber feet.
This mod is more complex to install, but the instructions on Thingeverse are detailed, follow them carefully. Here are some photos on how the installation went for me:
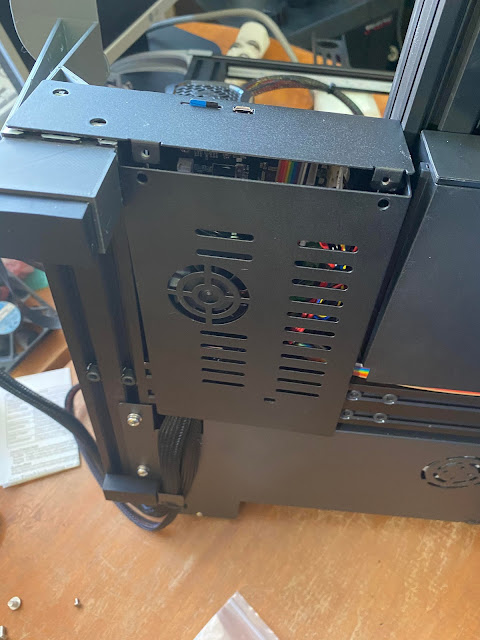 |
| Removing the printer board cover |
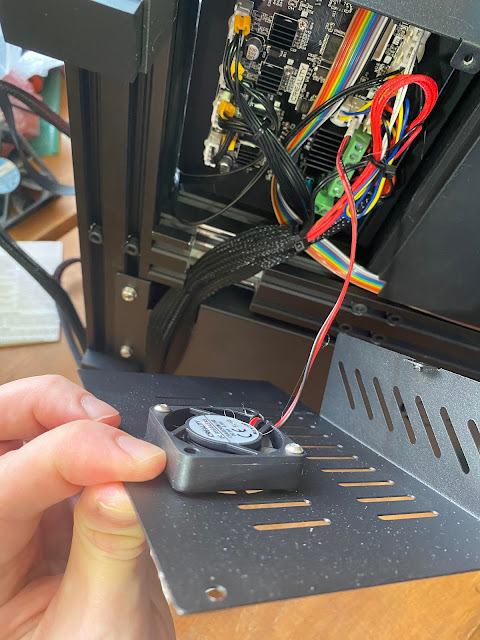 |
| Here you can spot the small but loud fan that cools down the motherboard. |
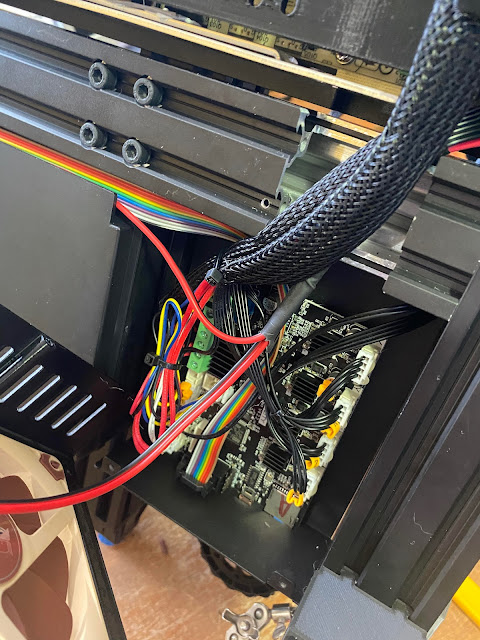
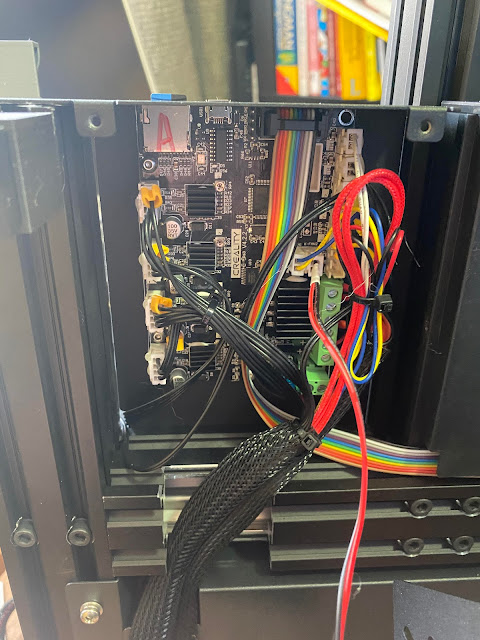 |
| A nice shot of the motherboard without its cover |
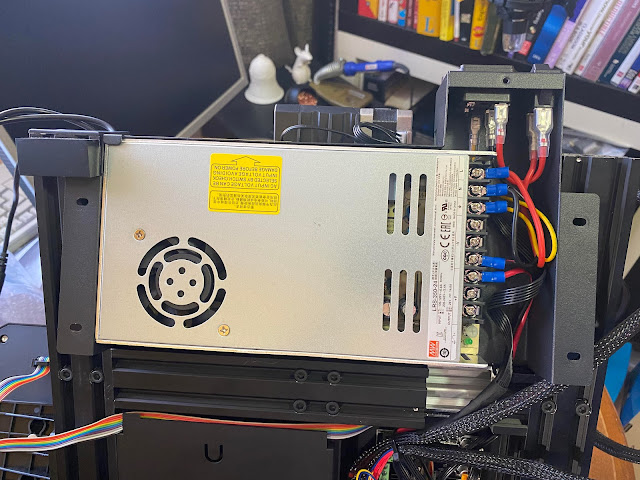 |
| A view of the power supply with its metal shield cover |
 |
| PSU opened with the fan disconnected |
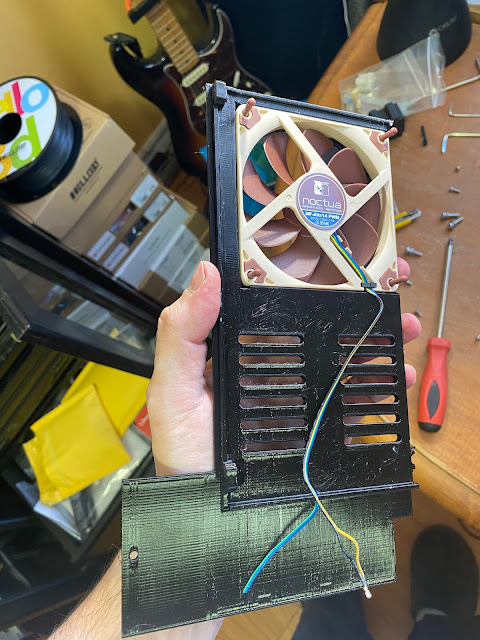 |
| New PSU printed lid with the new quiet Noctua fan installed. The OEM PSU fan was already 12V, so need to install a buck converter here. Also, the new lid allows for much better air intake ventilation. |
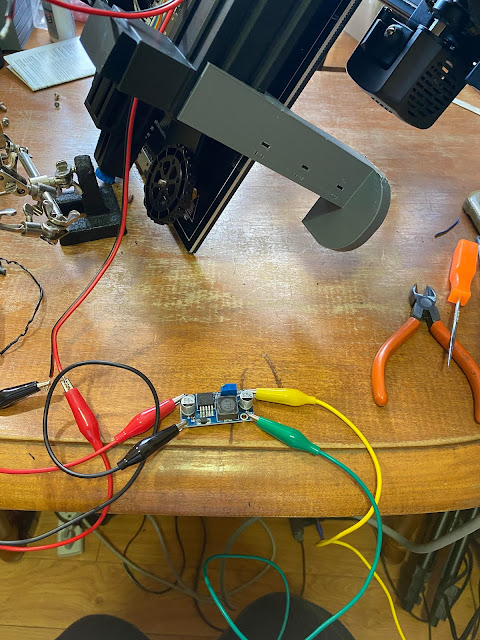 |
| Adjusting the buck converters voltage to match the 12V required by the new fans |
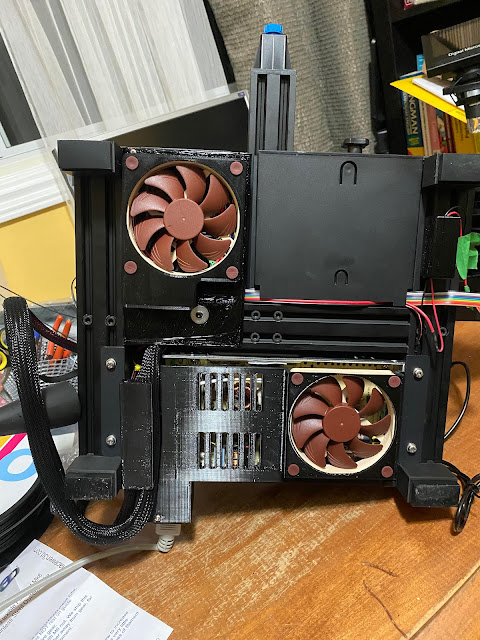
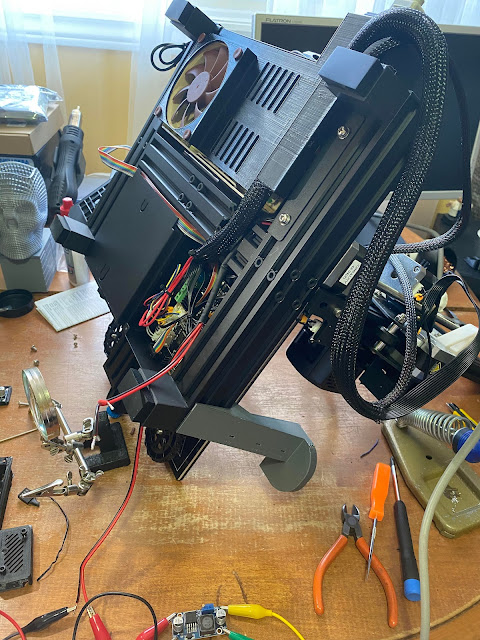 |
| Note the new feet risers already installed as well as the new PSU lid (with its new fan) |
 |
| For the motherboard fan, you need a buck converter to bring the 24VDC down to 12VDC to power the new PSU fan. |
 |
| The new motherboard fan will stay on at all times as its power comes straight from the PSU (the OEM design had it starting only with the hotend fan - contributing to overheating). |
 |
| Job completed! (Make sure to do some proper cable management as you progress to avoid issues later). |
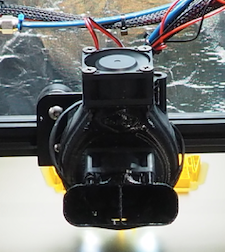 |
| This is a great and simple design will allow you much better bridge capabilities and it is much quieter than the OEM |
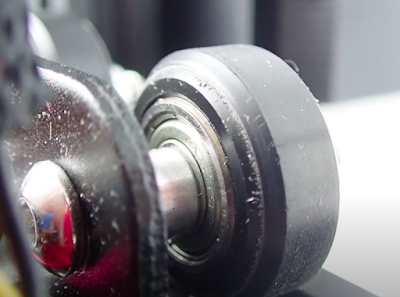
 |
| New flexible coupler installed with the ball bearing |
 |
| This is a really cool looking add-on. I printed in white and painted myself with permanent markers. The extruder knob movement mimics perfectly the beloved R2D2! |

 |
| A typical ferrule kit with crimping tool found on Amazon |
 |
| Example of a PEI bed from Creality |
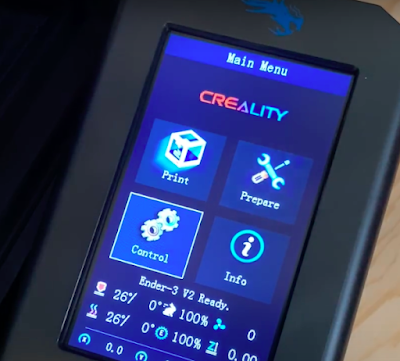 |
| Much nicer visuals and more information available with a firmware upgrade |
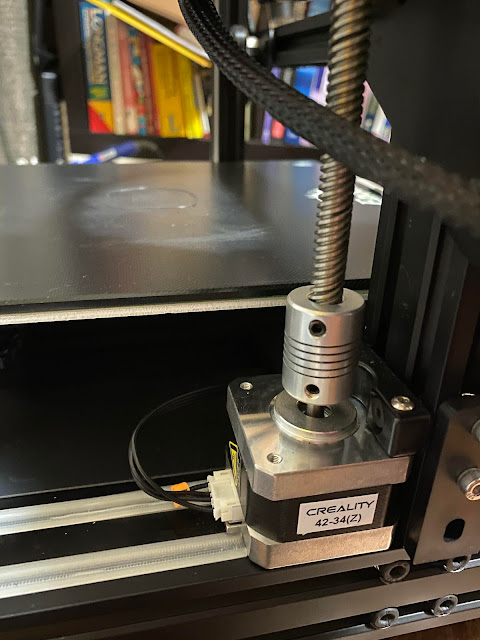
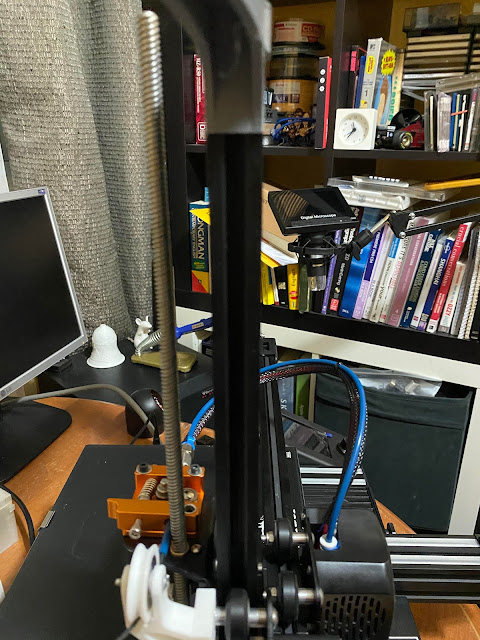
 |
| Adding dual Z-axis will greatly improve stability and help reduce Z-binding |
 |
| Creative CR Touch Upgrade Kit |
 |
| Cleaning and lubrication of the Z-rod with dry (non stick) Teflon |
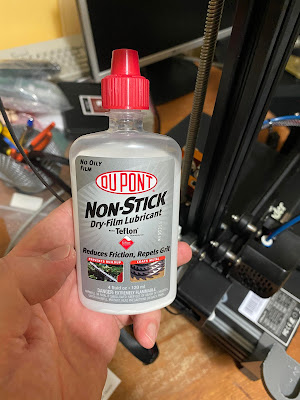 |
| Recommended lubricant for the Z-rod |
 |
| Adjusting the VREF voltages according to OEM |
 |
| Wear on the POM wheels |
I've started too now, I have my printer 5 weeks and already have done about 90% of what you have, with addition to dual Z new Hotend and now linear rails on my z and y with the X being done as soon as I've got my hands on a kit...
ReplyDeleteI found this through Reddit. I will definitely come back and reference this post. Thank you for compiling this!
ReplyDeleteThank you for nice feedback and good luck with your printer!
DeleteGreat post! I love how you broke down all the Ender 3 v2 upgrades. Super helpful for beginners and the photos made everything clear. Thanks for sharing your setup—excited to try some of these mods myself! HP ProBook 445 G10
ReplyDelete